
1. Introduction
This article mainly introduces how to set up the environment for the LKS_EVB_MCU453_V2.0 development board.
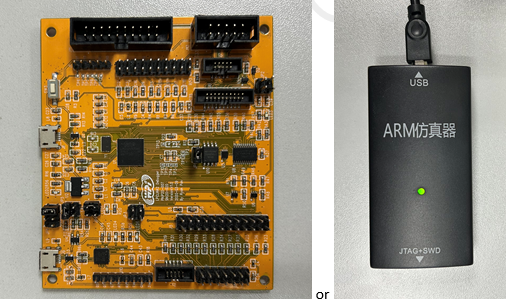
Hardware platform: LKS_EVB_MCU453_V2.0 development board, LPCLINK2 Debugger or Jlink.
Software platform: Keil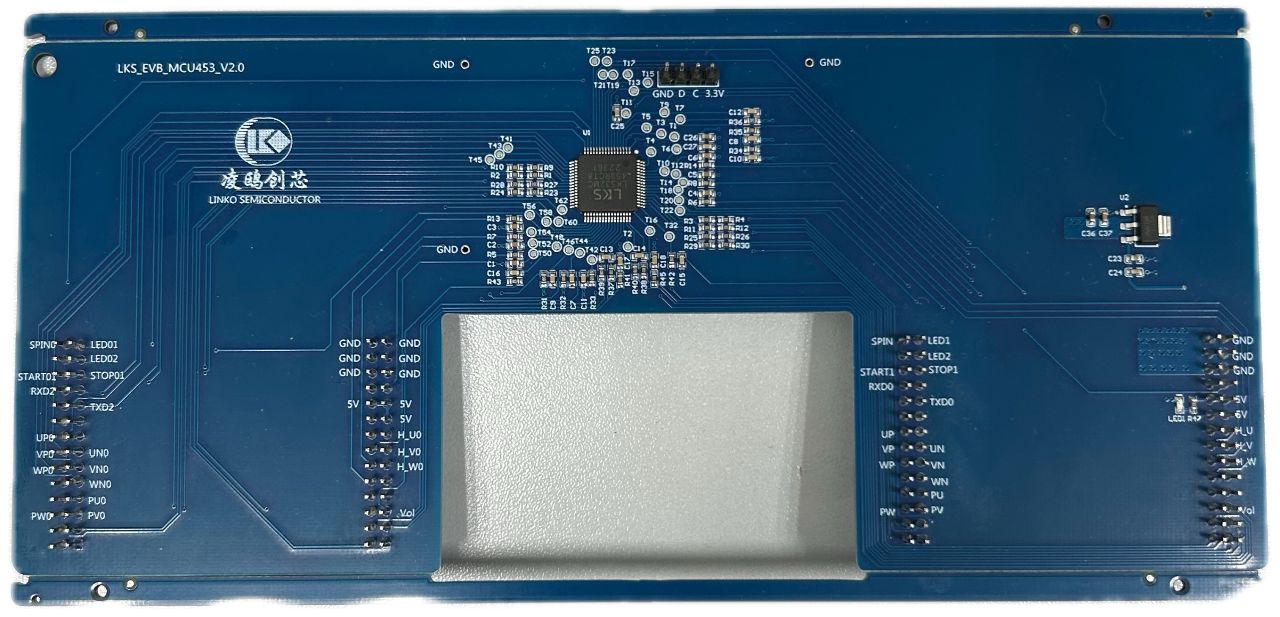
2. LKS Chip Driver Plugin Installation
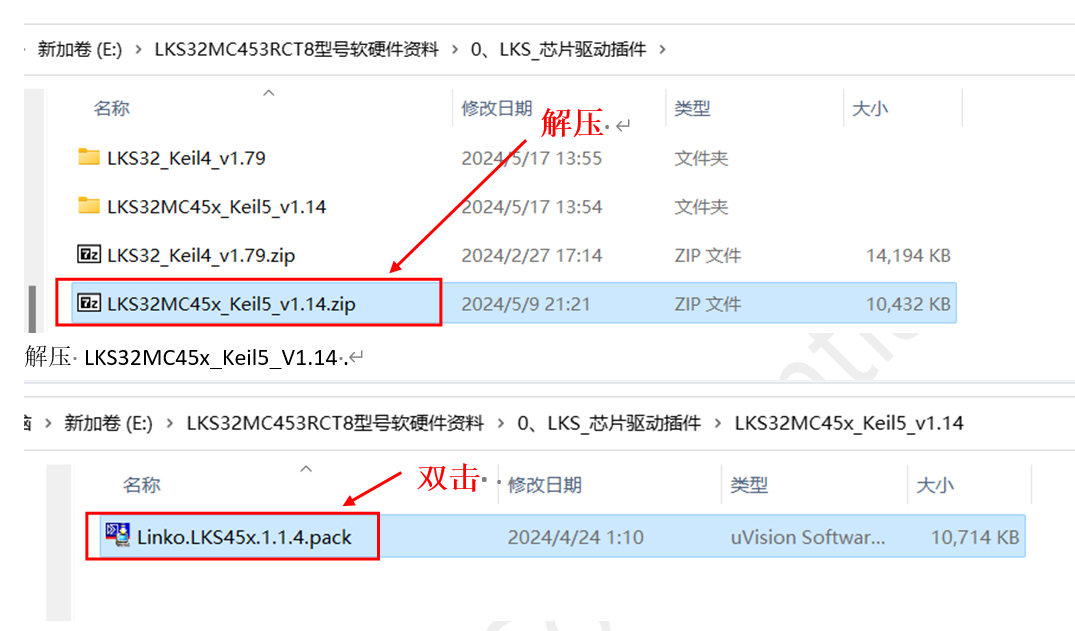
Navigate to the extracted folder and double-click Linko.LKS45x.1.1.4.pack.
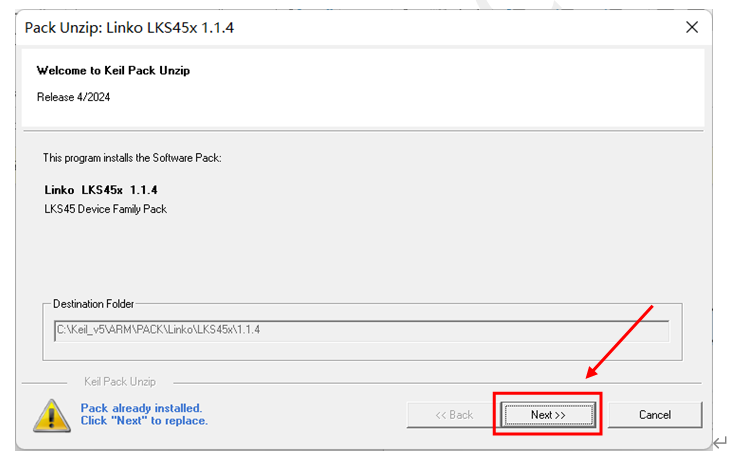
Click Next.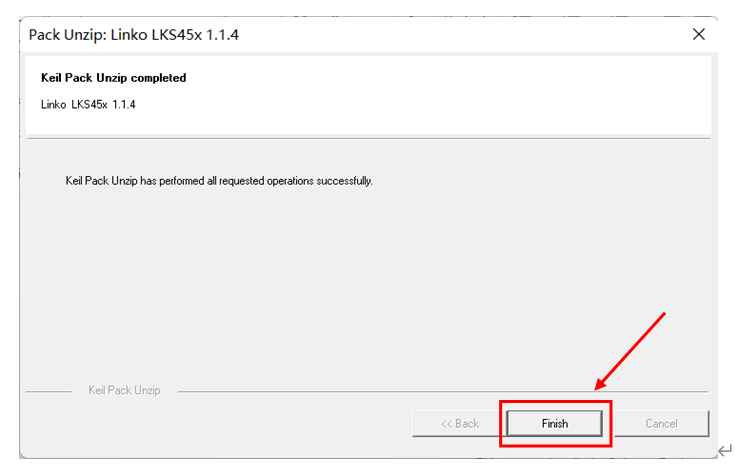
Finally, click Finish to complete the installation.
3. Keil Environment Setup
The folder shown below contains the LKS peripheral demo.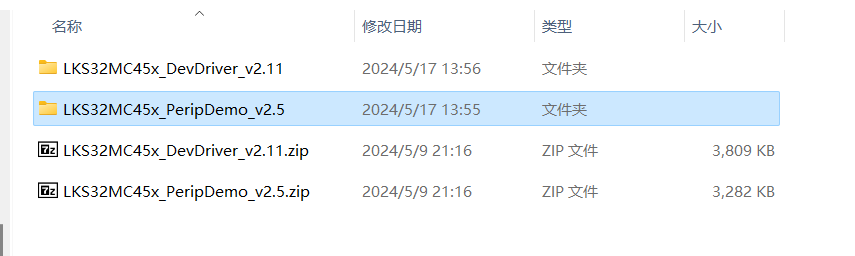
3.1 Software Pack
Open Keil and click the highlighted section.
Go to Options for Target and select the MCU signal LKS32MC453RCT8 that we are using.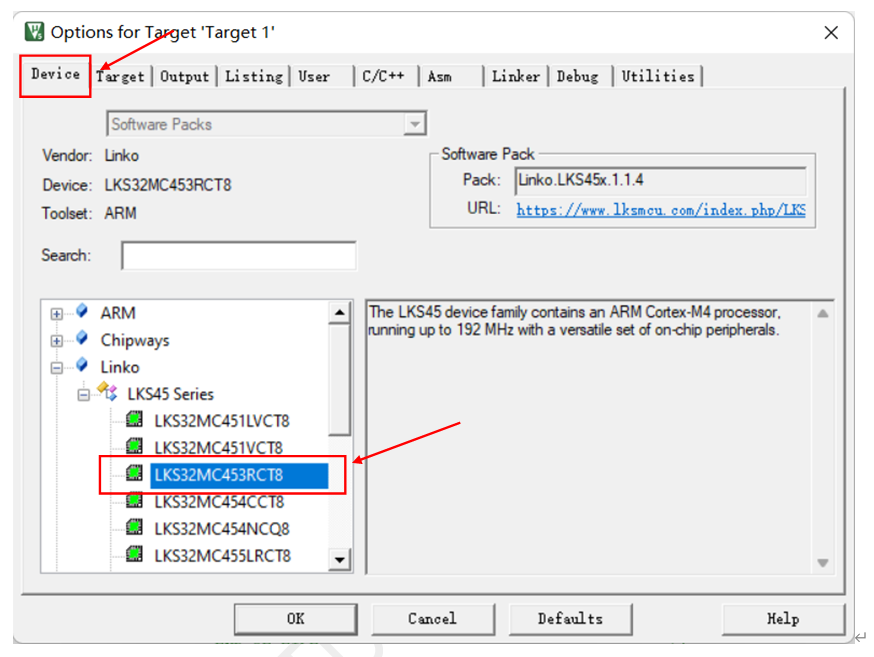
3.2 Debug Settings
Click the icon highlighted in the image.
Go to Options for Target, select the Debug tab, and choose CMSIS-DAP Debugger from the dropdown menu.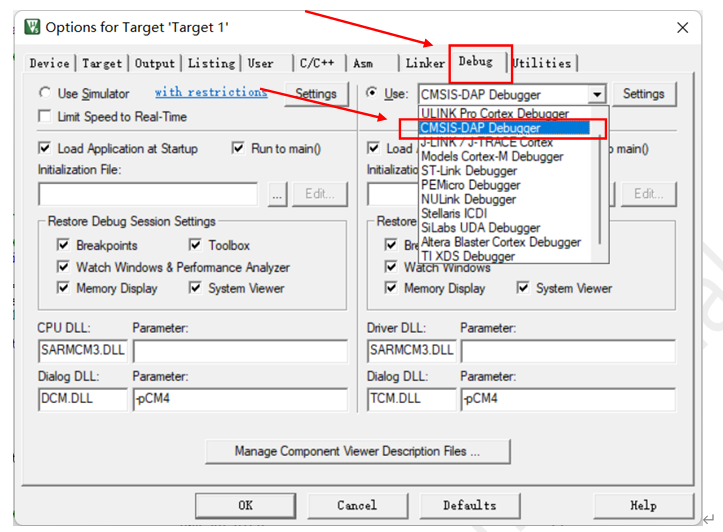
After selecting, click Settings.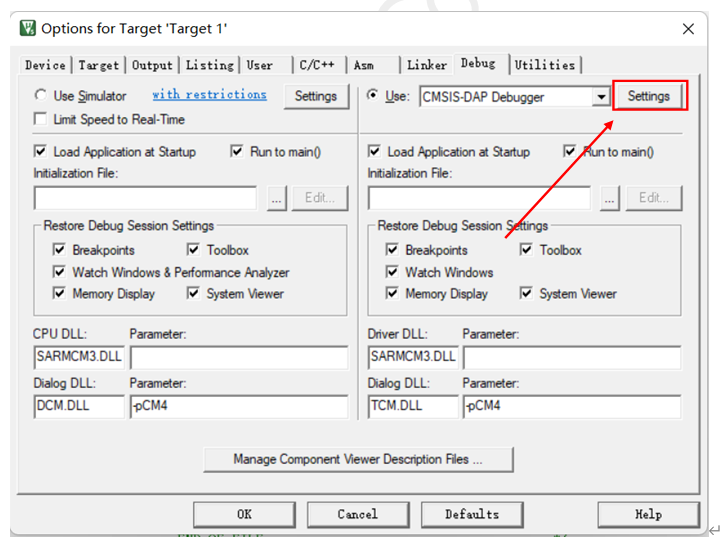
Go to the Flash Download tab and click Add.
Select LKS32MC45x 256KB Flash and click Add.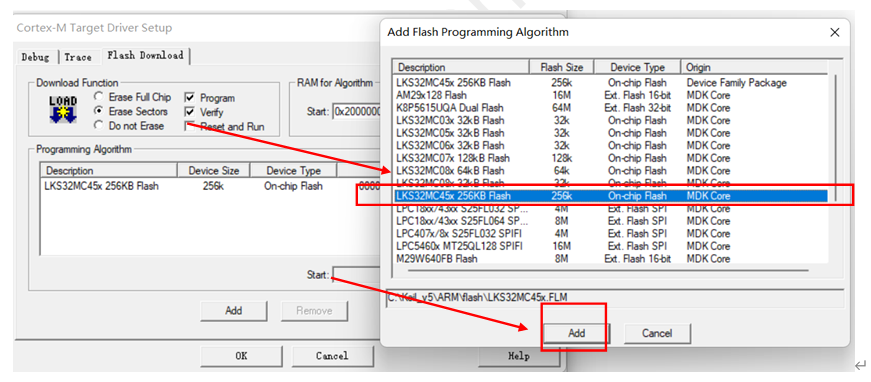
Finally, click OK to complete the setup.
3.3 Compilation and Download

As shown in the image:
- Left: Build target files
- Right: Build all files
- Download code to flash
- Start debugging
First, press 1 to compile, then 2 to download to the board.
4. Hardware Connection Method:
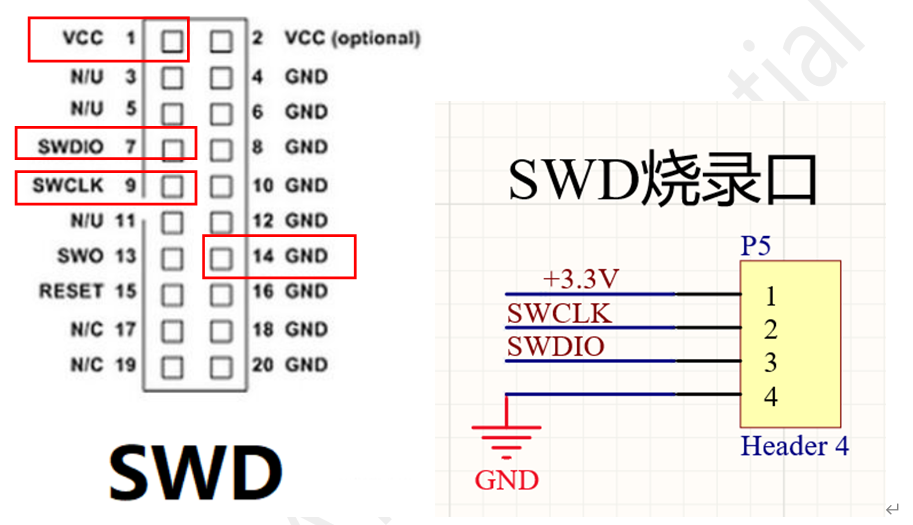
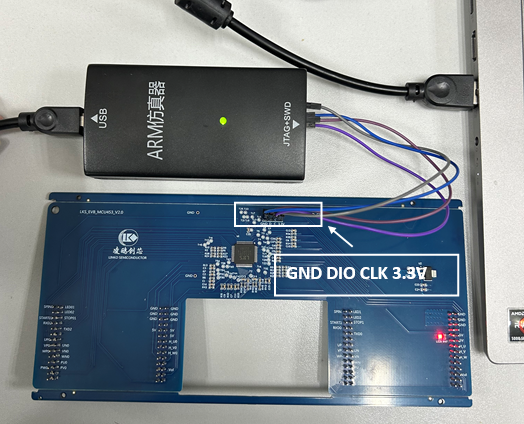
LKS uses the SWD interface for connection. The SWD programming port is exposed on the board as shown in the image. The SWD interface definition is also shown, and connections should be made accordingly.
4.1 LPC Debugger Method
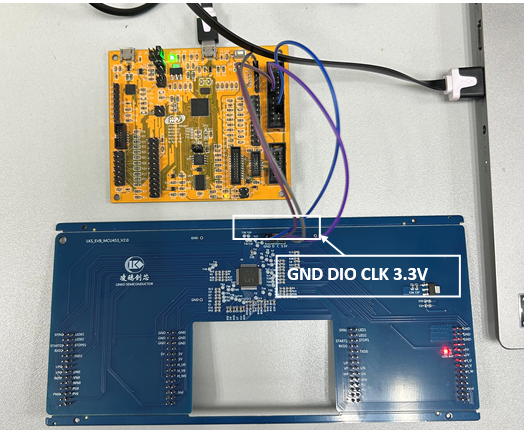
As shown in the image, the LPC Debugger board is connected to the LKS_EVB_MCU453_V2.0 board. The GND, DIO, CLK, and 3.3V pins on the board are connected to the corresponding SWD interface pins.
4.2 Jlink Method
As shown in the image, the Jlink is connected to the LKS_EVB_MCU453_V2.0 board. The GND, DIO, CLK, and 3.3V pins on the board are connected to the corresponding SWD interface pins.
5. Summary
This article provides a detailed step-by-step guide to demonstrate how to set up the environment for the LKS_EVB_MCU453_V2.0. After reading this, readers should have a basic understanding.
6. References
[1] LKS Device Driver Installation Package Example.docx
[2] SDK: LKS32MC45x_PeripDemo_v2.5
[3] Schematic: LKS_EVB_MCU453_V2.0.SchDoc
Feel free to leave comments below the blog, and we will respond to your questions promptly.
For further inquiries, please contact the WPI Group ATU Department: atu.sh@wpi-group.com Author: Xiao Li
For more information, scan the QR code to follow us!