This document introduces a vehicle body domain control solution I developed. The Auto BCM solution mainly consists of the following two parts:
- OTA Upgrade
- Supports storing MCU firmware locally on the G9;
- Supports one-click upgrade via the central control UI;
- Supports rapid transmission of local firmware to the MCU via CAN.
- Sensor Control
- Supports controlling the sensor status on the MCU by clicking the UI;
- Supports continuous transmission of sensor data from the MCU to the central control, displaying it on the UI;
- The G9 gateway has a pre-packaged forwarding interface, enabling one-click forwarding of information between the MCU and the central control.
The X9H is responsible for display and sending control commands, while the G9X handles intermediate forwarding, stores the MCU firmware version information, and sends the latest firmware to the MCU for upgrades. Below is the hardware block diagram of the solution:
2. Hardware Connection Diagram
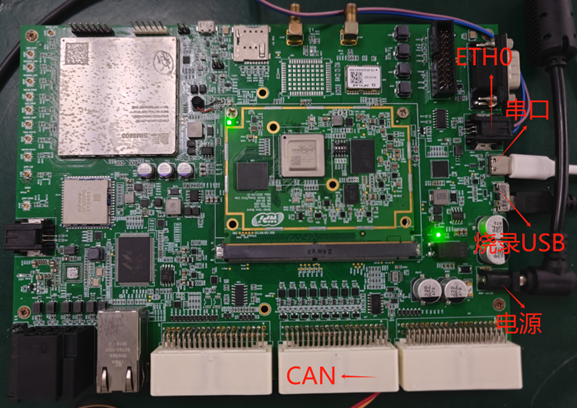
Below is an introduction to the G9X Spider board:
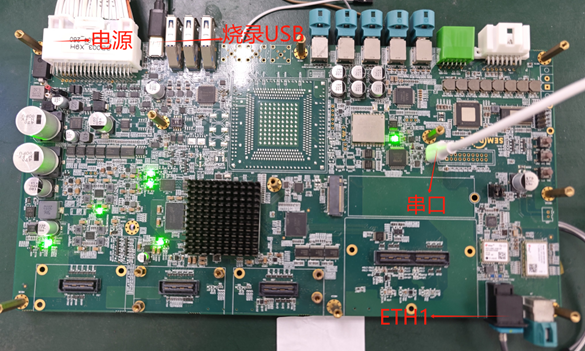
Below is an introduction to the X9HP_REF_A04 board:
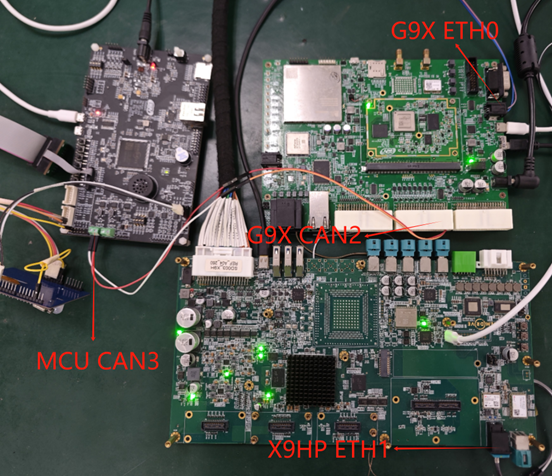
Below is the connection diagram of the G9X, X9HP, and E3210. The ETH0 of the G9X connects to the ETH1 of the X9HP, and the CAN2 of the G9X connects to the CAN3 of the E3210:
3. Operating Instructions
- Flashing the PAC Package
Set the G9X Spider board's DIP switch to 0001, and use the SDFactoryTool shown below to flash /image/G9X/g9x_ospi.pac and /image/g9x_global.pac. Then power off.
Set the X9HP development board's DIP switch to 0001, and flash /image/X9HP/x9hp_ospi.pac and /image/X9HP/x9hp_global.pac in the same way.

- Running the G9X auto_bcm Program
Set the G9X development board's DIP switch to 0000, power it back on, and access the AP serial port using the serial software shown below.
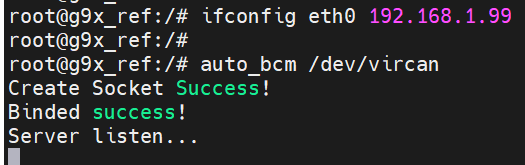
First, execute ifconfig eth0 192.168.1.99 in the serial port to set the IP address for communication with the X9HP. Then directly run the auto_bcm /dev/vircan command and wait for the X9HP to connect:
- Running the X9HP Auto_BCM APP
First, configure the network interface IP on the X9HP's AP1 serial port by entering ifconfig eth1 192.168.1.100.
Then, use adb push to install the Auto_BCM.apk on the X9HP board. The app can be found in the attachments. After installation, run the app:
- Testing the OTA Upgrade Feature
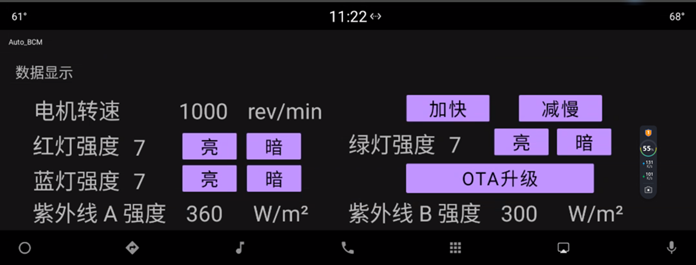
Click the "OTA Upgrade" button directly, and a prompt box will appear as shown below:

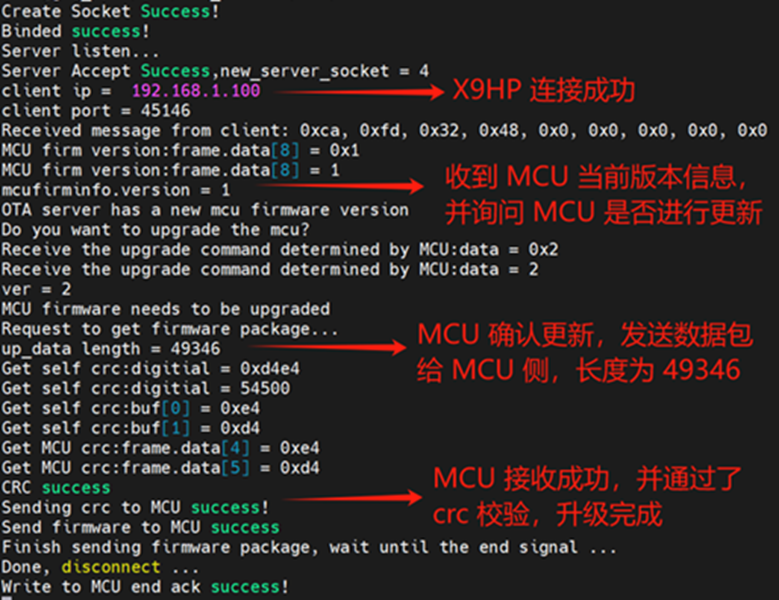
At this point, the OTA upgrade is in progress. You can view the OTA upgrade process in the G9X AP serial port:
- Testing the Control Feature
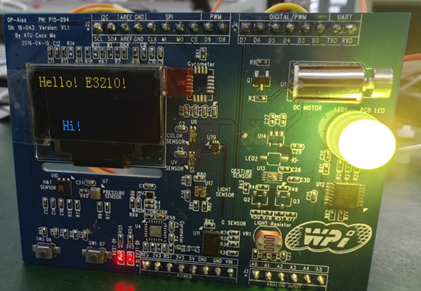
Click the button on the UI, and the values will change accordingly. The sensor on the MCU side will also change. For example, set the intensity of the red and green lights to 10:
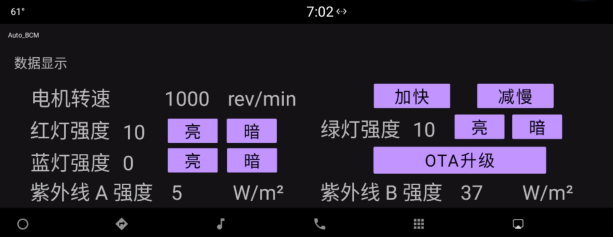
The X9HP successfully controlled the RGB sensor board, turning it yellow: